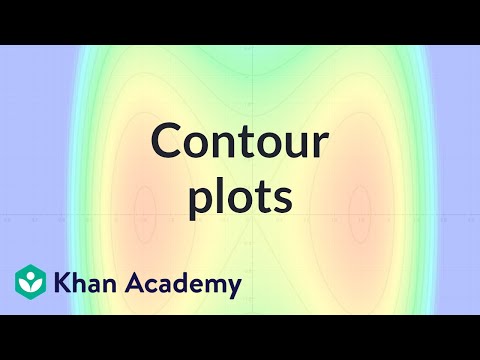
After finishing this part, you might be able to plot data units that include two impartial variables. Plots lined on this section are contour plots, crammed contour plots, and image plots. The different assets turn off the labeling of contour traces, and the "informational" label you saw on the decrease proper corner in the previous contour plots. Contour plotting is on the market in both 2D and 3D graphs. Contour plots may be primarily based on tabular data or mathematical expressions inside the identical graph, and the contour plot data can lie on a regular grid or at random factors. Various contour annotation options can be found, such as the ability to specify the contour label font, and whether the labels have stable backgrounds and/or borders. Contour traces alone can be displayed, or they can be mixed with contour shading. Contours can additionally be displayed on surfaces, as illustrated in one of many graphs below. Use contour plots to display the relationship between two independent variables and a dependent variable. The graph exhibits values of the Z variable for combinations of the X and Y variables. The X and Y values are displayed along the X and Y-axes, whereas contour strains and bands symbolize the Z value. The contour traces join combinations of the X and Y variables that produce equal values of Z.
Next, I will choose the Legend tab to make some changes. This tab can also be opened by double-clicking on the contour legend within the plot. First, you can see the legend is just too tall with all the additional contour ranges. Simply toggle Resize routinely to scale down the height of the legend. You can change the legend Alignment from vertical to horizontal, add customized header textual content, alter font size and sort, or change the text color. See this Knowledge Base article, Changing a Contour Legend Variable Name. Tecplot 360 will mechanically assign the contour levels based on the variable range in your dataset. The contour chart is part of the contour plot in Excel used to show the set of three-dimensional data within the form of a Mesh floor. We can use this chart to find the optimum mixture of two units of knowledge points. So, this chart shows the connection between data points. It is evident from the contour plots that the back face-sheet deflection of the graded density panel may be very smooth compared with the one density panels. This is supported by the froth characterization results, by which the elastic modulus of the SAN M200 foam was discovered to be far greater than both the M100 or M130. For all three foam types cracks happen at round one quarter and three quarters across the width of the panel, causing excessive displacement gradients in these areas. The pull-out in the PMI and PVC cases was larger than the SAN case because of less core damage within the SAN foam core. This signifies that SAN is more resistant to the momentum and negative stress bending which causes the pull-out. Origin can create contour plots instantly from XYZ data in a worksheet without the necessity for an intermediate matrix.

Delaunay Triangulation is used to compute and draw the contour strains. Creates a contour plot containing the isolines of matrix Z, the place Z incorporates height values on the x-y airplane. MATLAB® automatically selects the contour traces to display. The column and row indices of Z are the x and y coordinates in the airplane, respectively. A custom boundary could be applied to contour plots created instantly from XYZ data the place user provides the info factors for the boundary in extra columns of the identical worksheet. This characteristic is beneficial when there is a specific boundary data that defines the define of an object, for instance the profile of an engine where the contour exhibits engine temperature. Clicking the Multiple radio button causes every stage to be a different, user-specified shade. By default, multiple colors are set utilizing the colours of the discrete colour table that's lively when the Contour plot is created. To change the color for any of the degrees, click on on the level's Color button and select a new colour from the Popup colour menu. To change the opacity for a degree, move its opacity slider to the left to make the extent extra transparent or move the slider to the proper to make the level extra opaque. The major portion of the Contour plot attributes window, also called theContour colours space, is devoted to setting contour colours. Contour plot colors may be assigned three other ways, the primary of which makes use of a shade desk. A colour desk is a named palette of colours that you could customize to suite your needs. When the Contour plot makes use of a color desk to paint the levels, it selects colors that are evenly spaced by way of the color desk based on the number of ranges. As a rule, growing the variety of ranges results in coloration that's nearer to the color desk as a result of more colours from the color desk are represented.

To color a Contour plot with a color table, click on the Color table radio button and choose a colour table from the Color desk menu to proper of theColor desk radio button. The Contour plot typically creates contours by way of a variety of values by linearly interpolating to the following value. You also can change the size to a logarithmic perform to get the listing of contour values by way of the specified vary. To change the size, click on both the Linear or Logradio buttons within the Contour plot attributes window. The Contour plot attributes window provides controls that let you specify synthetic minima and maxima for the information within the plot. This is useful when you've a small vary of values which are of curiosity and also you only want the contours to be generated by way of that range. To set the minimal value, click the Min examine field to enable the Min textual content area and then sort a new minimal worth into the text field. To set the maximum value, click the Max verify field to allow the Max text field after which kind a new maximum value into the textual content area. Note that either the min, max or both may be specified. If neither minimal nor most values are specified, VisIt uses the minimum and most values in the database. This plot, shown in Figure 3.14, displays the location of values for scalar variables like density or stress using strains for 2D plots and surfaces for 3D plots. In visualization phrases, these plots are isosurfaces. VisIt's Contour plot allows you to specify the variety of contours to display in addition to the colours and opacities of the contours. The default contour plot drawn contains labeled tick marks and an "informational" label on the bottom right of the plot, indicating the range and spacing of the contour levels. Later examples present how to turn this informational label off, and how to customise the tick marks.

Also, since no ranges have been outlined for the X and Y axes on this plot, the range values default to 0 to n-1, where n is the number of factors in that dimension. Open a workstation for drawing the contour plots, and use a useful resource listing to alter the colormap to one known as "default". The creation of a useful resource listing will be described within the next section. Use contour plots along side regression analysis to statistically take a look at the relationships between variables. Another form of contour plots displays the fitted relationships between variables in regression models. For an example of this functionality utilizing binary logistic regression, read my publish about Statistical Analysis of the Republican Establishment Split. Specifies the contour lines to display as the last argument in any of the previous syntaxes. Specify levels as a scalar value n to show the contour strains at n automatically chosen levels . To draw the contour lines at specific heights, specify ranges as a vector of monotonically growing values. To draw the contours at one top , specify ranges as a two-element row vector . The Contour Plot software can be utilized to create a contour and 3D floor plot for the given data factors. These plots can help visualize the info in 2/3 dimensions. Contour Plot is typically used to plot data for the continuous data kind the place the output is a perform of two input variables. We can do the identical factor to get a bivariate density, besides with little bivariate kernel functions . But, we can't just merely put "density height" on the vertical axis – we need that for the second dimension. Surface and contour plots are handled in this appendix; false-color plots are the subject of appendix D. Surface and contour plots are created utilizing gnuplot's splot command (short for "surface plot"). It's a close relative of the familiar plot command; most of what you already know will carry over directly.

Up to this point, we've been working with data that only accommodates one unbiased variable . However, meteorological data is inherently spatial and infrequently requires two or extra independent variables. The easiest sort of 2-D plot you may use to visualize this type of data is a picture plot. Image plots essentially show pixelated values of a single dependent variable as a operate of two unbiased variables . It is hoped that the above examples would have made it completely clear how primary contour plots are created. Thus far we've discovered the completely different strategies of creating inputs and z functions for our contour plot. Now, we are going to venture towards the styling aspects of our contour plots. Plotly presents numerous data visualization libraries to plot charts and graphs. We can select from an enormous set of plotting libraries, and tools dedicated to creating varied different varieties of charts out there on the market. In this article, we are going to principally be working with a single import package and only a single plot operate. Draw a contour plot of the pres variable and fill the contour traces in strong colors using a grayscale shade map that you define your self. Then create a contour plot of that operate, and show the labels by setting the ShowText property to 'on'. Plt.imshow() by default follows the usual image array definition where the origin is within the upper left, not in the lower left as in most contour plots. At any confidence level below the important degree, the contour plots is not going to overlap and there shall be a statistically important distinction between the info units at these ranges.

Matplotlib API accommodates contour() and contourf() features that draw contour lines and filled contours, respectively. In this article, we shall be going to study in regards to the Plotly library for Python and the various ways through which fascinating contour plots may be created. We shall be looking at various examples of contours plots with detailed code evaluation for each example. We may even be studying multiple methods to customize one's contour plot. For this plot, use grayscale values to fill the contour ranges. Color maps are represented by NumPy arrays of purple, green, and blue float values starting from 0. The first entry in a colour map is the background shade, and the second entry is the foreground colour. To get a colour map of grayscale values, use equal values for R, G, and B. Create and draw a contour plot of the 2-dimensional array tempa. The first argument of the Ngl.contour function is the workstation object returned from the earlier call to Ngl.open_wks. The subsequent argument is the 2-dimensional NumPy scalar area to be contoured, which may be of the NumPy float, double, or integer sorts. The first dimension should be the Y dimension, and the second the X. The X and Y data is listed in single column ranges . You can change the color of the contour lines with col, passing a shade or a color palette, such within the instance below, which attracts contours for the volcano data set. Contour plots painting data for three variables in two dimensions. Each contour line is proven in an \(X-Y\) plot and has a continuing value on a 3rd variable.

Consider the Figure \(\PageIndex\) that incorporates data on the fats, non-sugar carbohydrates, and calories present in a selection of breakfast cereals. Each line shows the carbohydrate and fats levels for cereals with the identical variety of calories. Note that the variety of energy just isn't decided precisely by the fats and non-sugar carbohydrates since cereals also differ in sugar and protein. The following example reveals two contour plots in an overlay plot. The strong contour lines represent the 90% confidence degree whereas the dashed contour traces characterize the important confidence stage, which is calculated to be 94.243%. This permits you to calculate and display the minimal confidence degree at which the 2 contour plots intersect. Function in Base R to supply contour plots which might be well-suited for initial investigations into three dimensional data. We then develop visualizations using ggplot2 to gain extra control over the graphical output. We additionally describe several data transformations wanted to perform this visual exploration. You can adjust the current color map, or select a different one from the dropdown menu in the heart of the dialog. For this plot, we would like a sequential color map, such because the default Viridis color map or one of many cmocean color maps. These color maps are perceptually linear; that's, there is a linear increase of luminosity across the dimensions. Many of the cmocean colour maps will be useful for this dataset, however I will select the haline color map to match the salinity variable on the plot. In basic, contour plots are helpful for capabilities of two variables .

Contour plots are a approach to show a three-dimensional floor on a two-dimensional plane. It graphs two predictor variables X Y on the y-axis and a response variable Z as contours. These contours are generally referred to as the z-slices or the iso-response values. Perhaps a pixel-by-pixel plot is not going to tell us what we wish to know about a specific 2-D data field. In such instances we'd need to look at a contour plot of the data. Contour plots attempt to group areas of similar value. Contour strains can pinpoint specific values better and the contouring course of tends to clean the data. In case you're not acquainted with deciphering contour plots, you can take this little detour... 2%, 5% and 10% plots have 50, 20, and 10 contour strains which would possibly be distributed so that the identical variety of cells fall between every pair of contour traces. Logarithmic plots distribute the contour levels logarithmically in peak; every contour line encloses twice as many events because the previous. There are a number of options available in drawing the plots . These embrace the option of drawing "2%", "5%", "10%", or "Logarithmic" contour plots, and "outliers" or no outliers. Smoothing doesn't alter the info nor does it distort it. We have discovered on this article about the primary ideas of Plotly and how it can be personalized as per our wants.

At final, we additionally observed how to code an advanced plot. Hope this text helped you in learning and understanding Plotly higher. Here the z perform is a coordinate array just like the earlier instance. Using the Numpy import package deal further permits us to make use of more advanced data for our contour plots. In the next example, we are going to observe how we will put a trigonometric id for our z operate. There are times when you wish to add different graphical objects to a plot, like a label bar, a legend, tick marks, or a title. In PyNGL, there's one thing known as a PlotManager that permits you to do that. Also, if you resize the original plot, then these extra objects get resized as well. Some of these objects are at all times drawn by default, like tick marks and a title . PlotManager assets start with "pm", and label bar sources start with "lb". These sources are documented within the Labelbar resource descriptions and "PlotManager" useful resource descriptions sections.